1 (2)
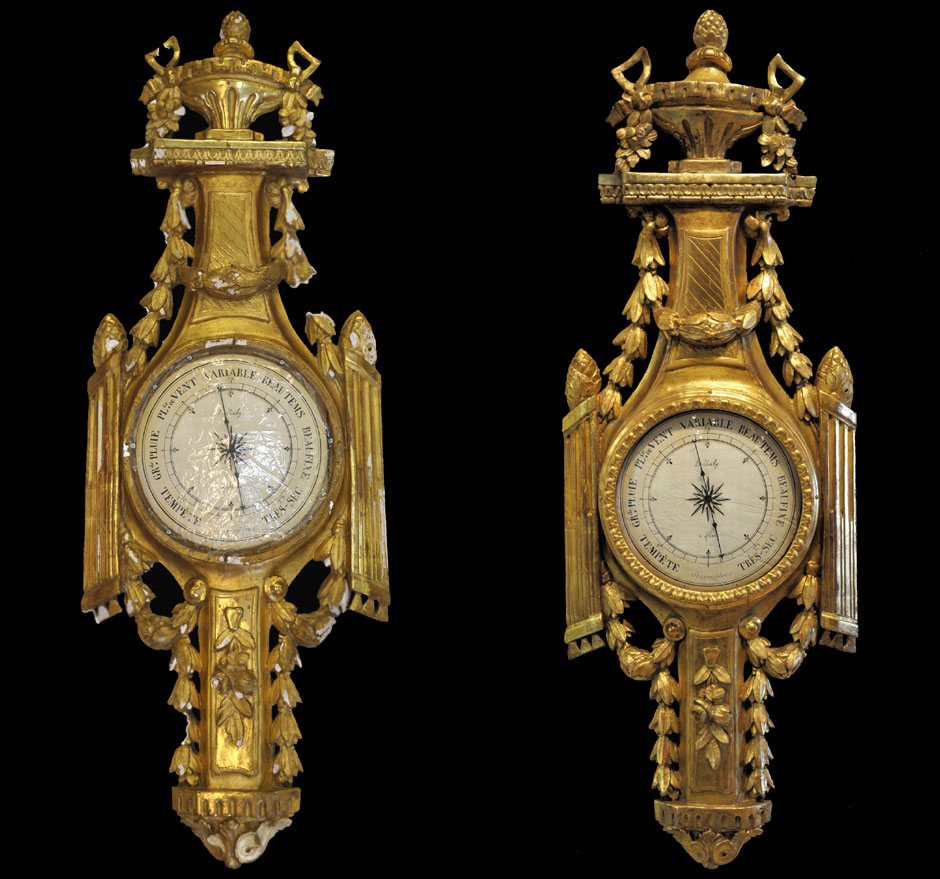
This antique barometer was long overdue for some restoration after 262 years of touchups. It still worked and was fairly accurate, having an intricate system of mercury-filled glass tubes and pulleys inside the back panel. As supporters of the Code of Ethics set forth by the American Institute of Conservation (AIC), we strived to restore this old barometer with as little intervention as possible.
2 (2)
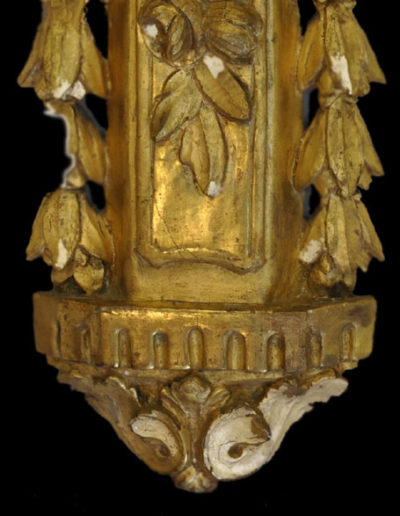
The first thing we noticed up examination was that the barometer had sustained a considerable amount of damage. There were numerous structural cracks in the wood assembly and the gesso layer, with areas of gesso and gilt loss. In addition, the original 22Kt water gilt finish had been compromised with various metallic sundries, from over-the-counter touchup paraffin-based crayons to gold radiator paint.
3 (2)
After removing the bezel, which was cracked and separated in three pieces, we protected the barometer dial face with plastic and began stabilizing the fragile cracked gesso with rabbit skin glue (RSG). Using a tiny #2 sable watercolor brush, we “swam” RSG under the cracks in the gesso.
5 (2)
After the RSG was allowed to dry overnight, we cleaned the entire barometer with solvents to remove any excess dirt, nicotine, and furniture polish residue from years of dusting with wax-based products. When dry, we mixed and applied new gesso to the chipped areas with a #6 Kolinsky sable brush, making sure to slightly overfull each recessed area.
7 (2)
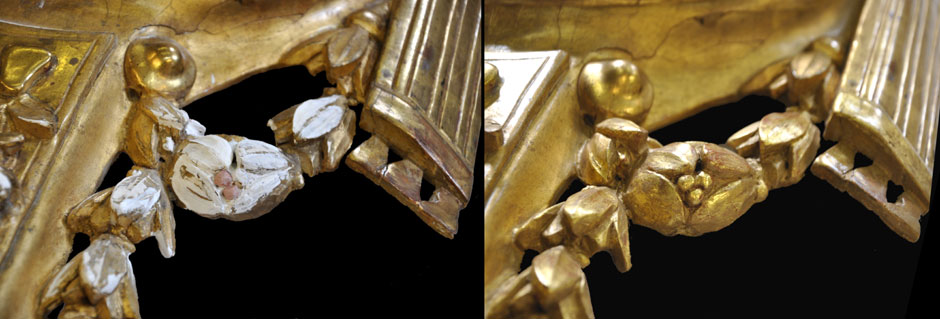
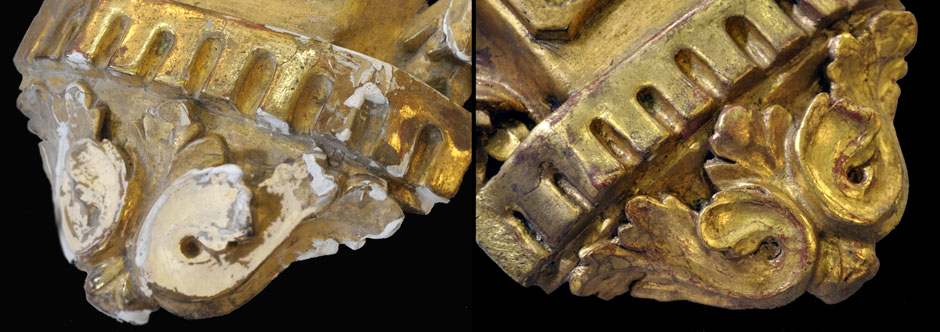
The barometer had at least a dozen bad repairs – even where someone had used bread dough to replace missing ornaments. Shown here, we removed the bad repairs, stabilized the surfaces, and added new gesso and ornament detail.
8
The bezel, which at first crudely fit the barometer body, had to be reassembled with dowels at the joints. The joints were filled, carved to plane, and the entire round was machined (with a keen eye) to fit tightly against the barometer. Afterwards, we removed the radiator paint with a diluted strength of methylene chloride which we immediately neutralized with solvents and mild detergents. Following, we applied several coats of gesso.
12
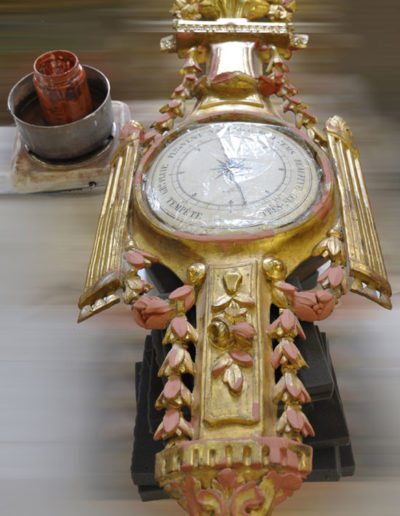
After all chipped areas were filled with several coats of gesso, and sanded smoothly; matching rouge burnishing bole was warmed and applied with a #6 Kolinsky sable brush.
10
After all chipped areas were filled with several coats of gesso, and sanded smoothly; matching rouge burnishing bole was warmed and applied with a #6 Kolinsky sable brush.
14
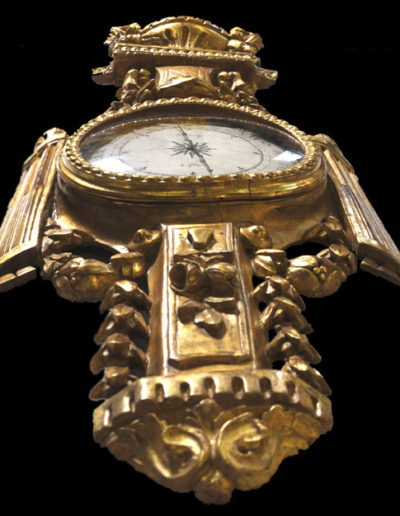
In the next stages, we water gilded the rouge bole areas with 22Kt genuine gold leaf. After burnishing with an agate, we distressed and patinated the new gold leaf areas with horsehair cloth, antiquing glazes, and rottenstone to blend with the original finish.
16
In the next stages, we water gilded the rouge bole areas with 22Kt genuine gold leaf. After burnishing with an agate, we distressed and patinated the new gold leaf areas with horsehair cloth, antiquing glazes, and rottenstone to blend with the original finish.
18
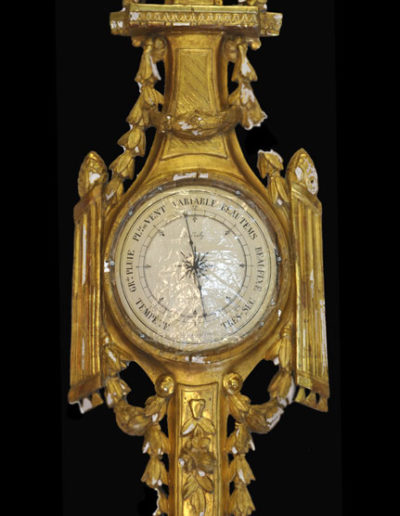
The barometer’s original glass was broken and had been fitted with an ordinary flat piece by the antiques dealer. We were able to acquire a more accurate “slumped” glass face to protect the dial. Because of the unusual shape, this was a good temporary solution to enhance the aesthetics.
19
The barometer’s original glass was broken and had been fitted with an ordinary flat piece by the antiques dealer. We were able to acquire a more accurate “slumped” glass face to protect the dial. Because of the unusual shape, this was a good temporary solution to enhance the aesthetics.
Before
After
